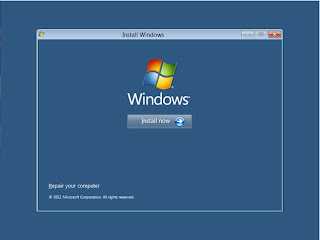
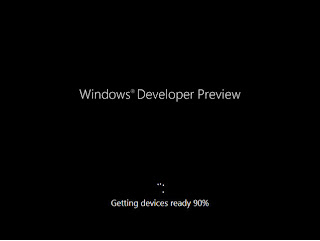
Recently, introduced the newest version of windows, ie Windows 8
but for now we can only enjoy the looks through of the windows 8 in the Developer Preview version ... you will feel the true appearance of the window 8, but the window 8 original version can't we enjoy in the market today, the new windows 8 will release it in 2012,, following a review and installation of window 8 version Devloper Preview
After 2 years ago when Windows 7 is released to the world market, and in September 2011, Microsoft pioneered by Bill Gates launched Windows update. Namely Developer Preview version of Windows 8. Where we can download it for free through Microsoft's official website. And for the final version will be launched in 2012. There is a 32 bit version (x86) and also there is a 64 bit version (x64).
To learn more with this version of Windows 8, here we try to look at the steps (Step by Step) Installation of Windows Developer Preview 8.
Step 1
Be sure to install each operating system, if we use your CDs / DVDs, we have to change the order bootingnya first.
Go to the bios menu on your computer, and set the boot device's:
1st: CD-Rom
2nd: HDD
Save the bios configuration, and installation will continue.
1st: CD-Rom
2nd: HDD
Save the bios configuration, and installation will continue.
step 2
After the windows install menu appears, we need to configure windowsnya accordance with our wishes. where:
Language to install: The language we will use to install
Time and currency format: time and currency formats. If we select the default settings (Classic), then Windows later will show the clock in 12 hour format coupled with the testimony of AM and PM.
Keyboard or input method: In accordance with the type of keyboard that we use. Namely U.S. layout (QWERTY).
After that, we click the Next button.
Bottom view shows the total capacity of the existing hard disk on our computer.
Step 4
Select New to create a partition. And write how much capacity the partition we want. Repeat the new click if we want to make the next partition.
After the partition that we make is finished, we select the partition we will install (Local Disk C). Then click Next.
Step 5
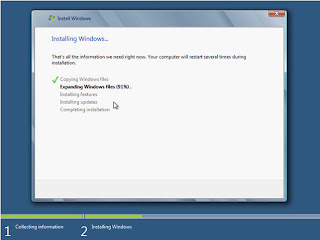
The installation process is underway. Wait for the installation process is complete and we just fill out the order and form required for our Windows 8. Such as setting the username, date and time, computer name, password, and others.
The installation process is almost complete, we just fill in the necessary data.
Step 6
Fill in your username that Windows 8. In accordance with our wishes. Then click next.
Step 7
Next came the display for setting the overall Windows. There are two options available. Select "Use express settings" if we use that option be set automatically by windowsnya. And select "Customize" If we have a choice.
After installation is complete, this is beginning to start the Desktop view windowsnya. Where the windows features are compatible with the touchscreen. Good luck and taste ... Windows 8 ^ _ ^
but for now we can only enjoy the looks through of the windows 8 in the Developer Preview version ... you will feel the true appearance of the window 8, but the window 8 original version can't we enjoy in the market today, the new windows 8 will release it in 2012,, following a review and installation of window 8 version Devloper Preview
After 2 years ago when Windows 7 is released to the world market, and in September 2011, Microsoft pioneered by Bill Gates launched Windows update. Namely Developer Preview version of Windows 8. Where we can download it for free through Microsoft's official website. And for the final version will be launched in 2012. There is a 32 bit version (x86) and also there is a 64 bit version (x64).
 |
| New vesion of Windows 8 |
To learn more with this version of Windows 8, here we try to look at the steps (Step by Step) Installation of Windows Developer Preview 8.
Step 1
Be sure to install each operating system, if we use your CDs / DVDs, we have to change the order bootingnya first.
Go to the bios menu on your computer, and set the boot device's:
1st: CD-Rom
2nd: HDD
Save the bios configuration, and installation will continue.
| Bios Setting |
Go to the bios menu on your computer, and set the boot device's:
1st: CD-Rom
2nd: HDD
Save the bios configuration, and installation will continue.
step 2
After the windows install menu appears, we need to configure windowsnya accordance with our wishes. where:
Language to install: The language we will use to install
Time and currency format: time and currency formats. If we select the default settings (Classic), then Windows later will show the clock in 12 hour format coupled with the testimony of AM and PM.
Keyboard or input method: In accordance with the type of keyboard that we use. Namely U.S. layout (QWERTY).
After that, we click the Next button.
Display the next screen:
Step 3
Appeared two installation options, upgrades used to upgrade the old version to the new one. If in the netbook existing windows version under windows 8. Custom options to choose according to the settings we want. For example if we want to create partitions. Here we try to choose the custom option.
Bottom view shows the total capacity of the existing hard disk on our computer.
Step 4
Select New to create a partition. And write how much capacity the partition we want. Repeat the new click if we want to make the next partition.
After the partition that we make is finished, we select the partition we will install (Local Disk C). Then click Next.
Step 5
The installation process is underway. Wait for the installation process is complete and we just fill out the order and form required for our Windows 8. Such as setting the username, date and time, computer name, password, and others.
The installation process is almost complete, we just fill in the necessary data.
Step 6
Fill in your username that Windows 8. In accordance with our wishes. Then click next.
Step 7
Next came the display for setting the overall Windows. There are two options available. Select "Use express settings" if we use that option be set automatically by windowsnya. And select "Customize" If we have a choice.
After installation is complete, this is beginning to start the Desktop view windowsnya. Where the windows features are compatible with the touchscreen. Good luck and taste ... Windows 8 ^ _ ^
 6:38 AM
 indigo


